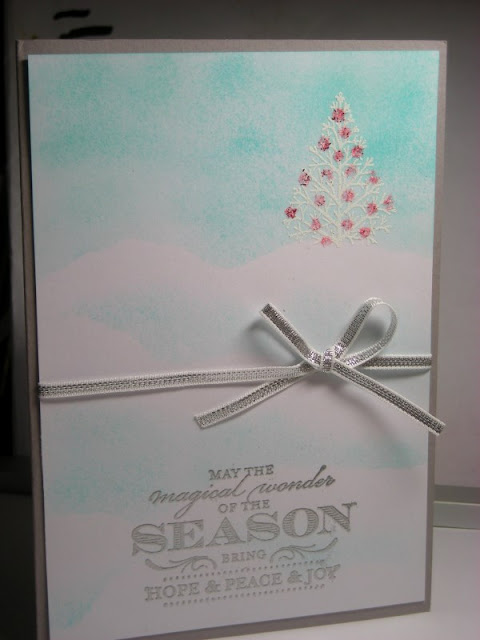
Masking, Sponging, Heat Embossing and Glitter Xmas Cards
 |
Stamps: Stampin Up
|
Since our seasons are upside down to the Northern Hemisphere
we usually sweat it out on Christmas Day, go swimming or hide under a shade
tree and eat cold foods… but we can’t help but have a hankering for a white
Christmas. Since our cold winter
weather is in July, I thought some Christmas cards might be in order!
This first one uses sponging, masking and heat embossing… my
craft table was full of embossing jars, pieces of paper and pieces of sponge
lol.
I’ve rarely done masking before but it was certainly easy
enough. Using a torn strip of paper,
longer than the cardstock, hold it there
in position while sponging above it. I
started at the top :) Then move the piece of paper around a bit,
angle it etc., and repeat, ensuring your sponging doesn’t reach the top of the
previous line. Repeat.
 | |
| Sponging using a mask |
To sponge, it’s just a matter of dabbing the ink pad with
the piece of sponge and dabbing it on.
The tree was heat embossed in white (stamped in versamark,
sprinkled with white embossing powder and heated) and the red decorations on
the tree were done with a red sparkly embossing powder.
 |
| The embossed tree over the background sponging before the red dots were added |
In hindsight, I needed the sponging to be darker behind the
tree so it would stand out more.
At the base I added a silver heat embossed sentiment and
then a silver ribbon added just under halfway to finish the card front.
The white cardstock was attached to a grey card base and a
white cardstock layer added on the inside for writing on.
 |
| Stamps: Warmth & Wonder, inks: SU crumb cake, wild wasabi, always artichoke. Glitter: SU Dazzling Diamonds , Dazzling Details Silver. |
Card two used a little bit of embossing, stamping and
glitter ( I <3 glitter - even though you can't see the sparkle in this photo)
I started with the hill – once again tearing a sheet of
paper as a mask, I used the edge of the Versamark pad to dab along the edge of
the mask, sprinkled with sticky powder,
heated and then quickly added glitter.
I then stamped the deer and tree images and on the one green
tree I added dots of silver sparkle with Dazzling Details (a glitter glue I
think).
The sentiment was stamped, punched and attached – whilst I
could have stamped straight on to the card, I got a bit of ink on that part, so
punched and stuck on was the only option!
This card front was attached to a chocolate brown card base
and as before a white cardstock layer added on the inside for writing.
Have fun experimenting :)


Comments
Post a Comment